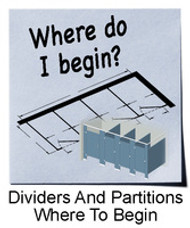
Bathroom Dividers and Partitions | Where to Begin
Posted by Gary Lederman on 21st Feb 2016
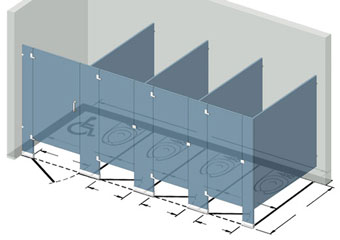
Bathroom dividers and partitions are important parts of any restroom renovation or new construction project. As such, the purchase process may seem daunting. But, it can be broken down into six simple steps: style selection, material selection, layout, number of stalls and screens, considering accessibility, and measurement.
Choose Your Style
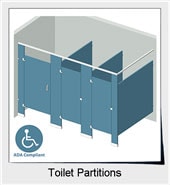
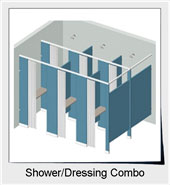
There are four unique partition styles to choose from: 1) Overhead Braced 2) Floor Mounted 3) Ceiling Mounted 4) Floor to Ceiling Mounted. Base your style choice on location and type of use. Each partition style offers unique benefits.
Overhead braced are the most popular option available. They are very stable and cost effective. Floor mounted installation is well suited to spaces with low ceiling heights (less than 84" high), but is the least stable style. Ceiling mounted partitions allow easy cleaning of restroom floors - as no components or hardware are touching the floor. This style requires careful measurement in advance and is not able to be used with drop ceilings. Floor to ceiling mounted stalls are the most expensive - and strongest - style available. This is because more material is involved, and the pilasters securely attach to both the floor and ceiling. As with ceiling mounted partitions, careful measuring in advance of your order is absolutely necessary to make sure the pilasters are the exact height of your room. See Available Partition Styles
Choose Your Material
Baked Enamel, Plastic Laminate, Solid Plastic, Solid Phenolic, and Stainless Steel are all options. In what area will the partitions be installed? Will it be in a stadium, bar, school, church, or restaurant? Is moisture a problem such as a sauna, shower, or pool area? Are corrosive elements an issue such as chlorine in pools or salt water near the ocean? High traffic areas require more durable materials and hardware. If graffiti or abuse is an issue then your choices are greatly narrowed. Once you’ve determined the exact situation your dividers will be installed, it’s time to pick the perfect material. Read More About Material Options
New vs. Existing Design
Using a new design is very simple. All the hard work to meet Federal and local codes has usually been handled - you already have plans. You just need to determine the best material and style. Existing is a bit more difficult. Once you’ve picked the correct material and style, a few simple changes to your existing design is usually all that is required. We can help with that.
How Many Stalls And Screens?
The number of stalls affects more than the total price of your project. It can also be a factor in the configuration of doors, hinges, and sizes. View Our Standard Configurations
Consider Accessibility
Wheelchair access, limited mobility, and disabled, are required in any partition design. Changing a door swing or adding space in a stall are usually necessary to meet ADA guidelines. Review ADA Guideline Excerpts
Send Us Your Measurements And Order Details and
Use one of our Measuring Guides to provide dimensions, or create your own simple sketch. Provide the overall measurements of your restroom space. Indicate the desired layout for your stalls and dividers. Show how wide and how deep each stall should be. Also note the desired door widths and whether you'd like them to swing in or out and if they need to open from the left or right. Call, email, or chat with us for details on how to send your request for a quote. Or you can use our online quote request form. Submit A Request For Quote
Beyond the layout and measurements, we will need to know the bracing style and partition material to provide an accurate quote. We’re here to help every step of the way, so be sure to give us a call, email, or chat with us if you have any questions!

